One of the best things about painting a landscape is that it’s not a portrait. You have a lot more freedom to change shapes and move things around. If you move an eye a centimeter to the left, everyone will call you on it. “What’s wrong with her eyes? She looks cross-eyed.” If you move a tree an inch to the left, or even to the other side of the canvas, nobody cares. It still looks like trees in a field with clouds in the sky. I don’t mean that you can put anything anywhere and it all works itself out. The composition still has to be balanced and the perspective believable. There’s plenty of books written on that alone.
My point is, you can get away with a lot more in a landscape and I like to take advantage of that. As soon as I realized that I don’t have to get every shape the right size and in the right place, I loosened up and started designing my own shapes. The reference became just that – reference. Not the goal. I now approach a plein air painting with a lot more conviction and start with bold, confident strokes. I focus on designing the shapes and trust my design sense to make the right decisions. The more you do this the better your design sense will get. You can also develop your design sense by watching experienced painters. You will subconsciously pick up on small nuances of the way they design.
My method of painting plein air can be broken down into 3 steps – layin, under-painting, thick tiles to a finish.
1. Layin
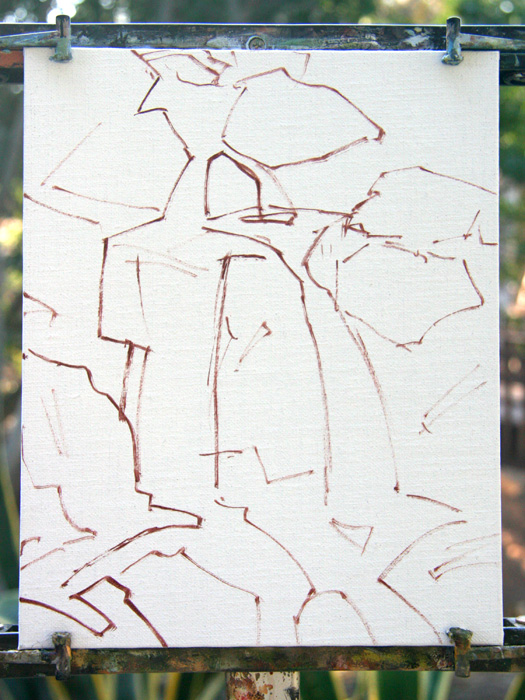
So, I started the layin with confident, large shapes. Not worried about getting it exactly the way I see it, but just to create a balanced composition. I try to keep my lines thin, for better control of the shape designs.
2. Under-painting
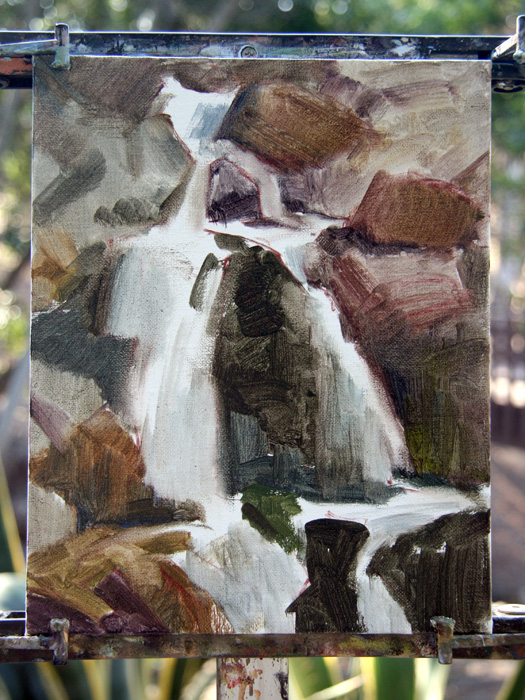
At this point I establish the major colors and values of all the shapes. All the paint is thinned with turpentine. I’m going for a graphic look at this stage, disregarding the edges. It’s all about the value and color breakdown at this stage. I will focus on my edges in step 3.
I will usually take a little break to let the turpentine evaporate from the under-painting. If there’s too much turpentine on the surface, thicker paint won’t have anything to stick to and will just slide around.
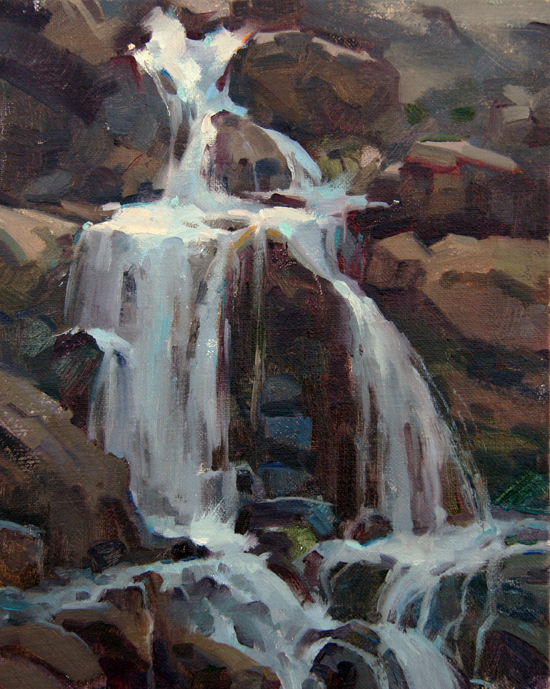
3. Finish
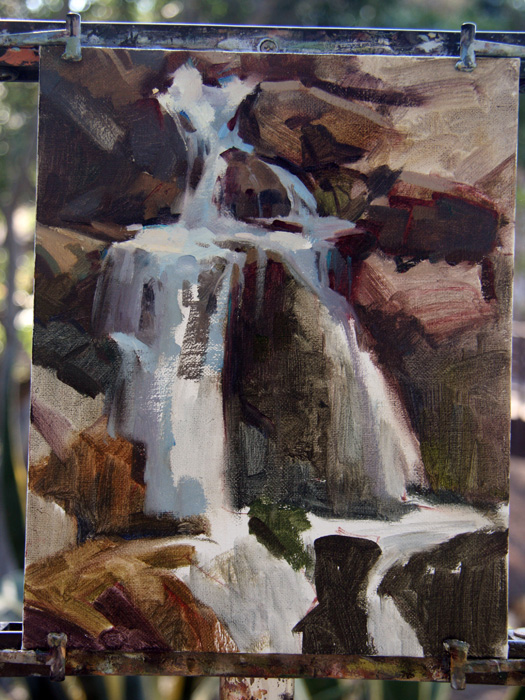
Start with the focal point
1. I am better able to concentrate on shape design and edge-work in the beginning of the painting session. Towards the end I can get tired or restless and start making poor decisions.
2. Sometimes I setup in a place I think is ideal, but after a few hours that spot isn’t so good anymore. During this painting for example, the sun came out after about 2 hours and hit my palette and face. The glare made it very hard to see the waterfall and the colors I was mixing.
Finish strong
You might get tired and hungry, but you have to push through and finish that painting. “I’ll take a picture and finish it at home” usually doesn’t work. Try to develop your endurance to stay focused and make strong decisions to the end. It gets easier with time.
As I get towards the end of the painting, I find areas that need to be simplified. If there are areas that are over worked, use the side of your brush and take out the details. Keep the viewers eye in the focal point.